Skip to content
Install JDK on Windows
- Download the installer from https://www.oracle.com/java/technologies/downloads/
- Version: 17 or 21
- You might need to login to proceed with the download. If you do not have one, create a new account using your personal email address.
- Running the JDK installer.
- You must have an administrator privileges to install the JDK on your computer. If you do not have, please check with your IT.
- Start the installation process by double-clicking the installer’s file.
- Follow the instructions provided by the Installation wizard.
- After the installation is complete, delete the downloaded file to recover the disk space.
Install Eclipse IDE on Windows
- Download the installer from https://www.eclipse.org/downloads/
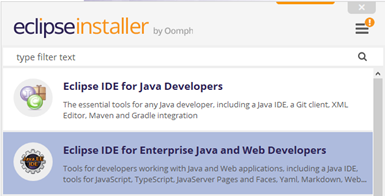
- Run the Eclipse installer.
- Select “Eclipse IDE for Enterprise Java and Web Developers”
- Accept the default configurations and click “Install”. Wait until installation has completed.
- Click “Launch” to start Eclipse.
- Choose a location for your workspace or just accept the default setting. Click “Launch”.
- Close the Welcome page to open the workspace.
Configure Eclipse to use installed JDK as the default runtime environment
- From the top bar, select Window -> Preferences -> Java -> Installed JREs, then click on Add…
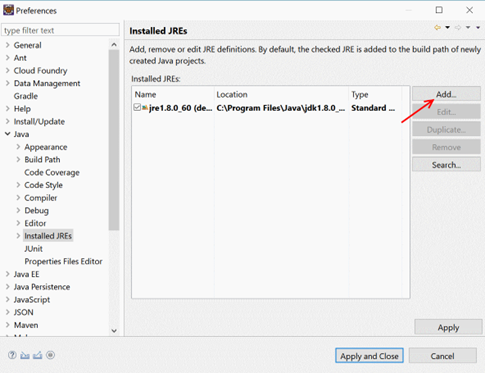
- Keep Standard VM selected, then click on “Next >”
- Browse and select your JDK installation folder by clicking on “Directory”, then click on “Finish”.
- Click on “Apply and Close”.