What is Spring Boot and what is the advantage of using Spring?
Spring Boot is a Framework from “The Spring Team” to ease the bootstrapping and development
of new Spring Applications.
It provides defaults for code and annotation configuration to quick start new Spring projects
within no time. It follows “Opinionated Defaults Configuration” Approach to avoid lot of
boilerplate code and configuration to improve Development, Unit Test, and Integration Test
Process.
Why Spring Boot?
- To ease the Java-based applications Development, Unit Test, and Integration Test Process.
- To reduce Development, Unit Test, and Integration Test time by providing some defaults.
- To increase Productivity.
Advantages of Spring Boot
- It is very easy to develop Spring Based applications with Java or Groovy.
- It reduces lots of development time and increases productivity.
- It avoids writing lots of boilerplate Code, Annotations and XML Configuration.
- It is very easy to integrate Spring Boot Application with its Spring Ecosystem like Spring JDBC, Spring ORM, Spring Data, Spring Security etc.
- It follows “Opinionated Defaults Configuration” Approach to reduce Developer effort.
- It provides Embedded HTTP servers like Tomcat, Jetty etc. to develop and test our web applications very easily.
- It provides CLI (Command Line Interface) tool to develop and test Spring Boot (Java or Groovy) Applications from command prompt very easily and quickly.
- It provides lots of plugins to develop and test Spring Boot Applications very easily using Build Tools like Maven and Gradle.
- It provides lots of plugins to work with embedded and in-memory Databases very easily.

That means Spring Boot is nothing but existing Spring Framework + Some Embedded HTTP
Servers (Tomcat/Jetty etc.) – XML or Annotations Configurations.
Main Goal of Spring Boot
The main goal of Spring Boot Framework is to reduce Development, Unit Test, and Integration
Test time and to ease the development of Production ready web applications very easily
compared to existing Spring Framework, which really takes more time.
- To avoid XML Configuration completely.
- To avoid defining more Annotation Configuration (It combined some existing Spring Framework Annotations to a simple and single Annotation).
- To avoid writing lots of import statements.
- To provide some defaults to quick start new projects within no time.
- To provide Opinionated Development approach.
Activity: Create a Maven project for Spring REST service
You will build a service that will accept HTTP GET requests at http://localhost:8080/greeting
It will respond with a JSON representation of a greeting, as the following listing shows:

You can customize the greeting with an optional name parameter in the query string, as the
following listing shows:

The name parameter value overrides the default value of World and is reflected in the response,
as the following listing shows:

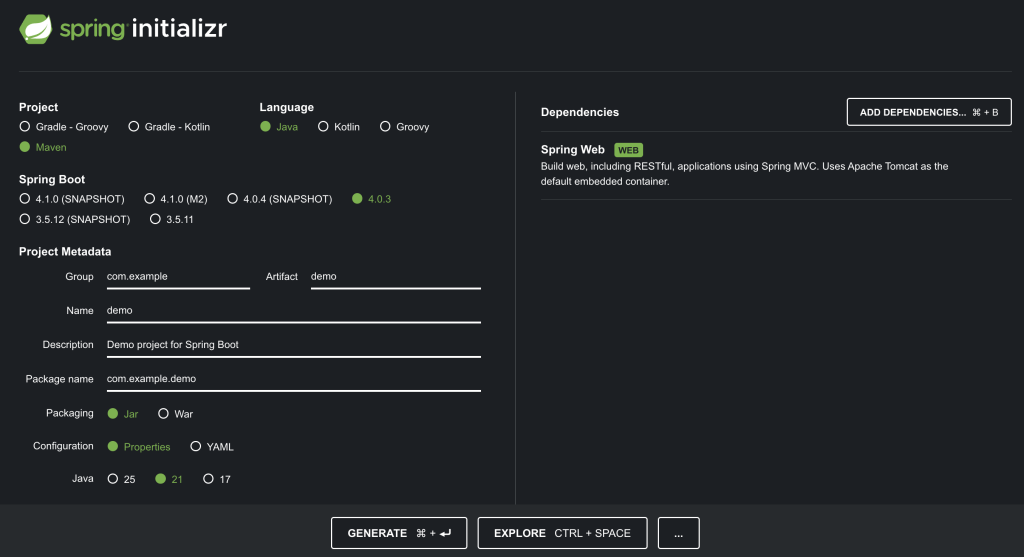
Starting with Spring Initializer
- Go to https://start.spring.io/
- Configure the new project.
- Project: Maven
- Language: Java
- Sprint Boot: default selection
- Project Metadata: default settings
- Packaging: Jar
- Java: choose your Java version
- Dependencies: Spring Web
- Click Generate button.
- Extract the downloaded zip file.
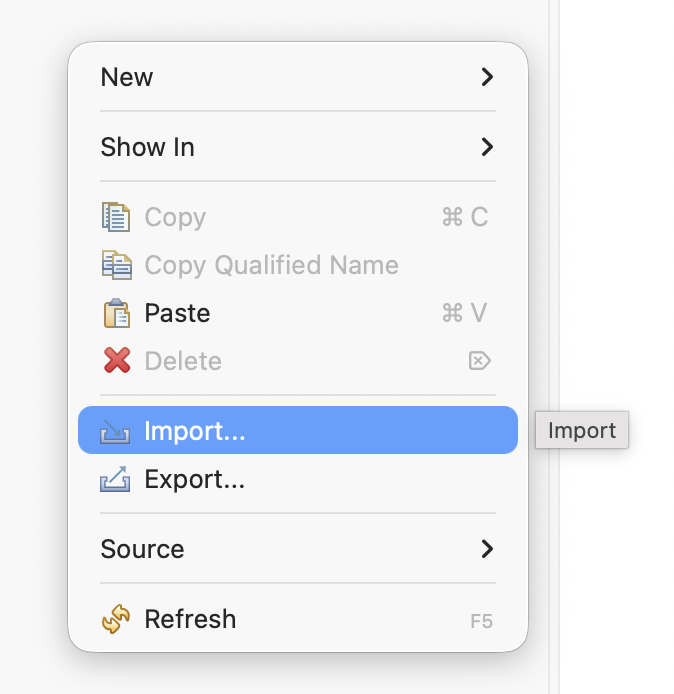
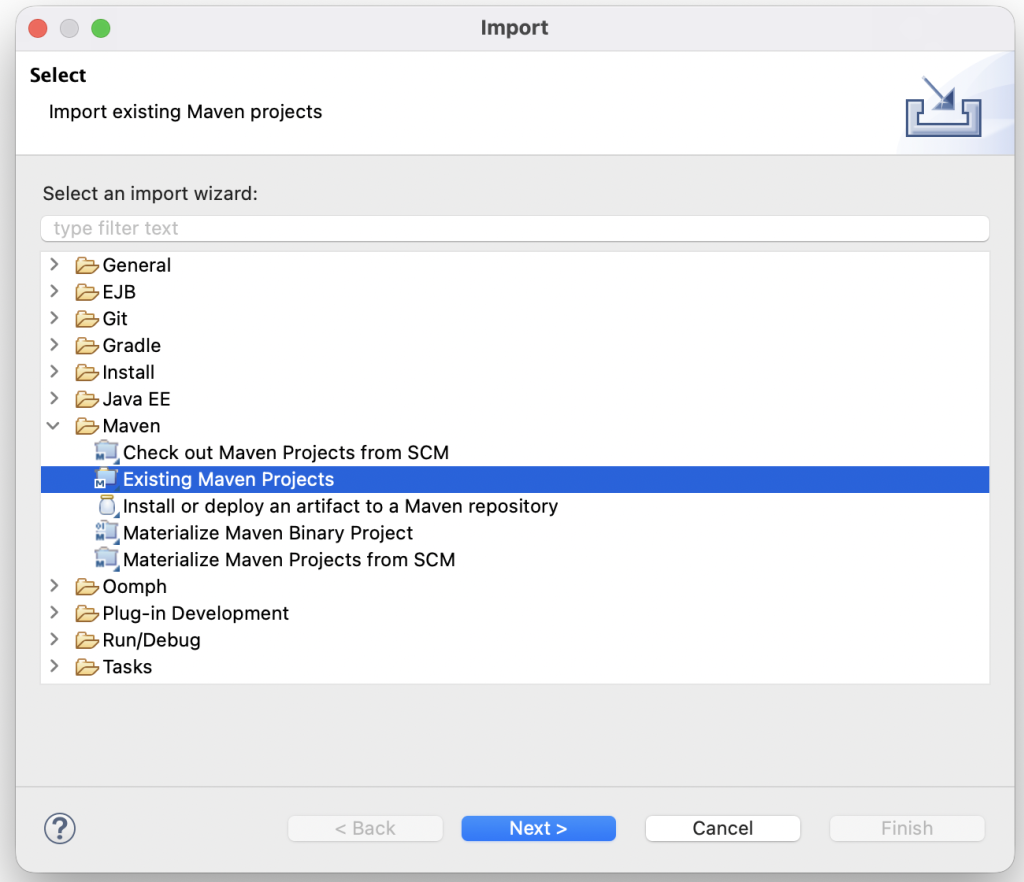
- Import Maven project into Eclipse.

Create a Resource Representation Class
Now that you have set up the project and build system, you can create your web service.
Begin the process by thinking about service interactions.
The service will handle GET requests for /greeting, optionally with a name parameter in the query string. The GET request should return a 200 OK response with JSON in the body that represents a greeting. It should resemble the following output:
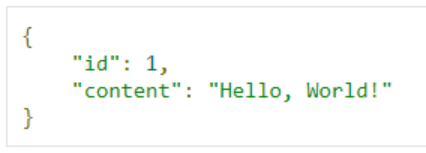
The id field is a unique identifier for the greeting, and content is the textual representation of the greeting.
To model the greeting representation, create a resource representation class. To do so, provide a plain old Java object with fields, constructors, and accessors for the id and content data, as below.
package com.example.demo;

public class Greeting {
	private final long id;

	private final String content;

	public Greeting(long id, String content) {
		this.id = id;
		this.content = content;
	}

	public long getId() {
		return id;
	}

	public String getContent() {
		return content;
	}
}
Create a Resource Controller
In Spring’s approach to building RESTful web services, HTTP requests are handled by a controller.
These components are identified by the @RestController annotation, and the GreetingController shown in the following listing, handles GET requests for /greeting by returning a new instance of the Greeting class.
package com.example.demo;

import java.util.concurrent.atomic.AtomicLong;
import org.springframework.web.bind.annotation.GetMapping;
import org.springframework.web.bind.annotation.RequestParam;
import org.springframework.web.bind.annotation.RestController;

@RestController
public class GreetingController {
	private static final String template = "Hello, %s!";

	private final AtomicLong counter = new AtomicLong();

	@GetMapping("/greeting")

	public Greeting greeting(@RequestParam(value = "name", defaultValue = "World") String name) {

		return new Greeting(counter.incrementAndGet(), String.format(template, name));

	}
}
This controller is concise and simple, but there is plenty going on under the hood. We break it down step by step.
The @GetMapping annotation ensures that HTTP GET requests to /greeting are mapped to the greeting() method.
@RequestParam binds the value of the query string parameter name into the name parameter of the greeting() method. If the name parameter is absent in the request, the defaultValue of World is used.
The implementation of the method body creates and returns a new Greeting object with id and content attributes based on the next value from the counter and formats the given name by using the greeting template.
This code uses Spring @RestController annotation, which marks the class as a controller where every method returns a domain object instead of a view. It is shorthand for including both @Controller and @ResponseBody.
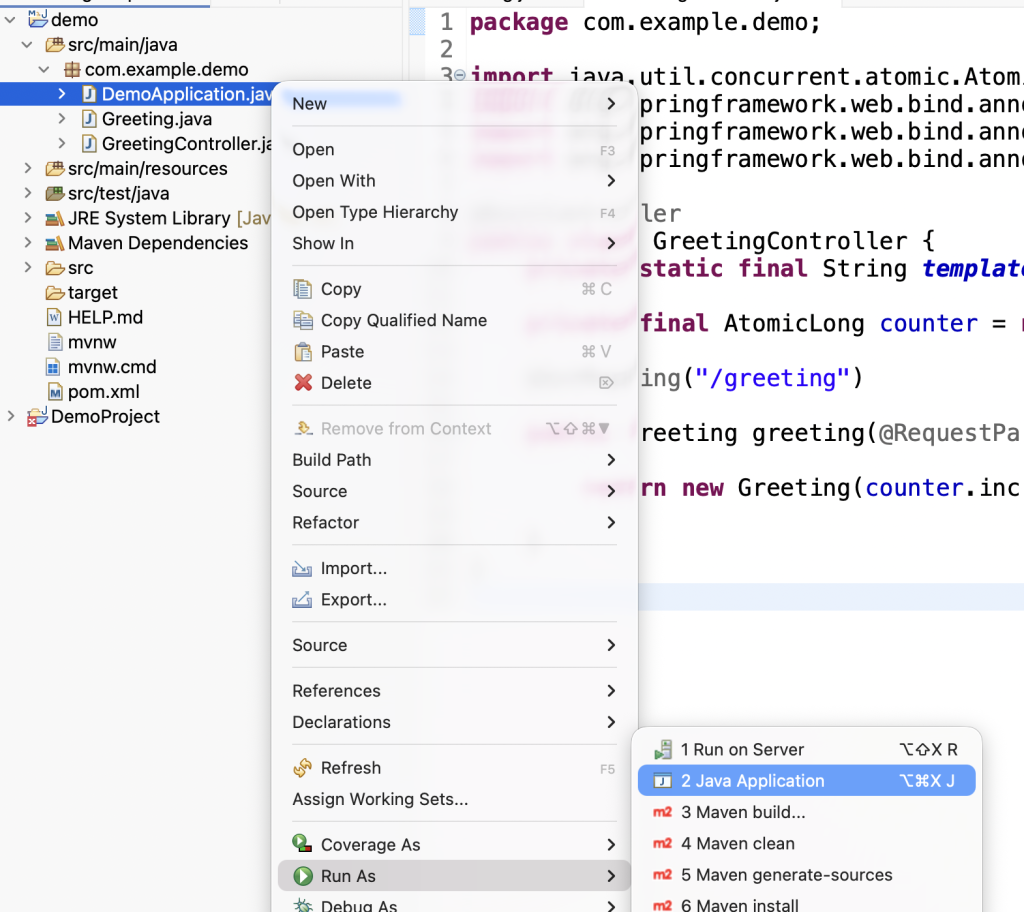
Run and Test
Run the project in eclipse and select Run As > Java Application.
When prompted, make sure to select the correct class that contains the main method eg. DemoApplication.
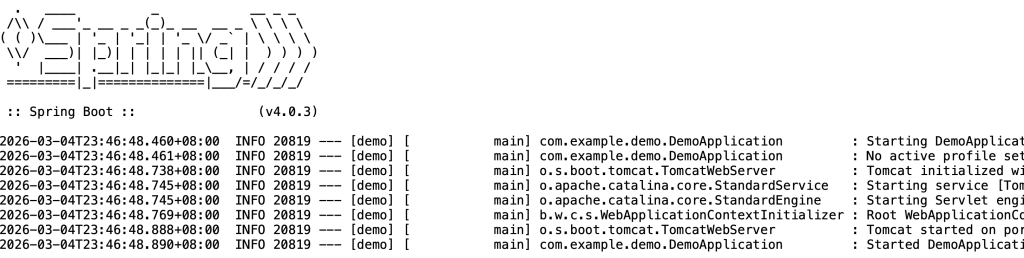
Now that the service is up, visit http://localhost:8080/greeting, where you should see:

Provide a name query string parameter by visiting http://localhost:8080/greeting?name=User. Notice how the value of the content attribute changes from Hello, World! to Hello, User!, as the following listing shows:

This change demonstrates that the @RequestParam arrangement in GreetingController is working as expected. The name parameter has been given a default value of World but can be explicitly overridden through the query string.
Notice also how the id attribute has changed from 1 to 2. This proves that you are working against the same GreetingController instance across multiple requests and that its counter field is being incremented on each call as expected.
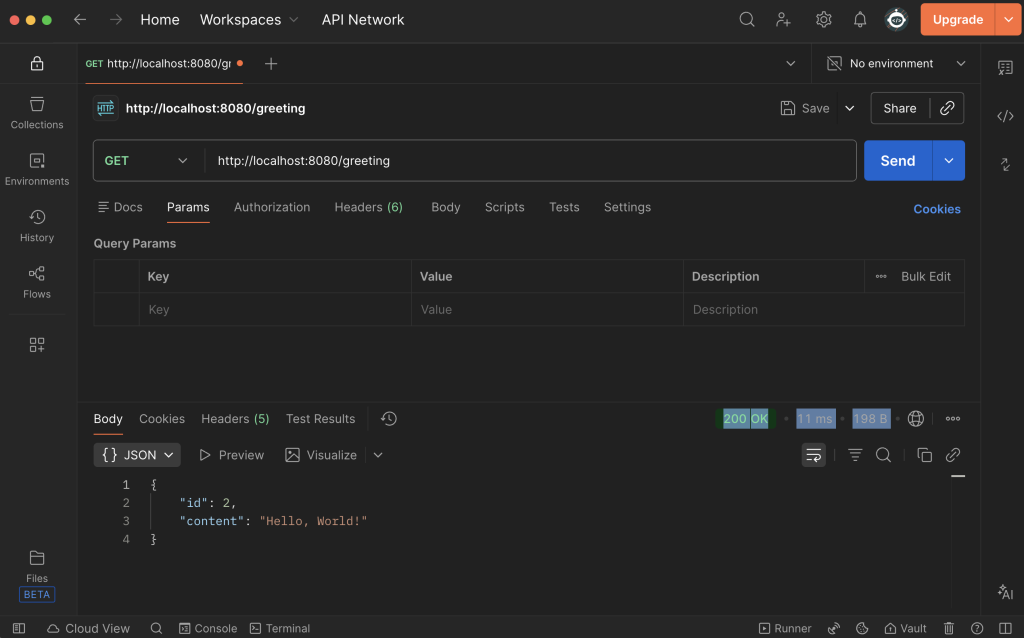
Run and Test your REST service with Postman
- Launch Postman. You might need to login if necessary.
- Select your workspace.
- Make sure GET method is selected then enter the URL http://localhost:8080/greeting
- Click Send.
- You will get 200 OK message with the Body content as below.
Try on your own
Try sending another GET request but this time send a parameter name.