Running Maven from Command-Line
To run a Maven build from the command line / terminal, you need to install the Maven command line tooling.
- Download the installer from http://maven.apache.org/download.cgi You can download either the zip/tar file.
- The installation of Apache Maven is a simple process of extracting the archive and adding the ‘bin’ folder with the ‘mvn’ command to the ‘PATH’.
- To test if you have Maven already installed, type the following command into your command line:
mvn --version - It should display something like below.

Compile and build a Java runtime library with Maven
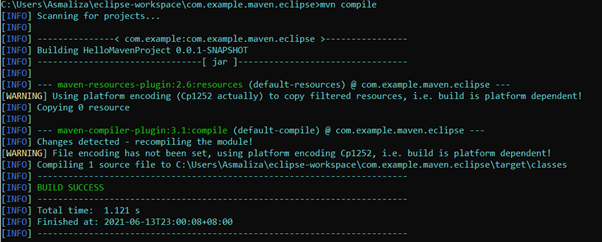
To compile you project from command line, type the following command
mvn compileIt should display something like below .
Run Java console application file from command line
Build the project by typing this command
mvn package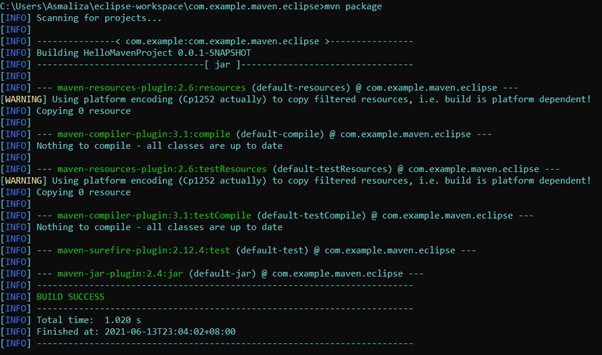
You may test the newly compiled and packaged JAR with the following command:

It should run successfully and display the “Hello World” message to the console.
Maven Module
A Maven module is a sub-project. To create a Maven module, you will need to already have a Maven project available.
Create Maven project with Multiple Modules
Reference: https://docs.jboss.org/tools/4.0.1.Final/en/maven_reference/html/creating_a_maven_application.html
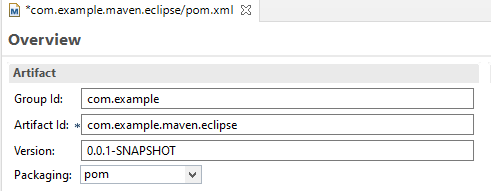
The parent project must have its Packaging option pre-configured to pom, for a module to be created and associated with it. To ensure your parent project has this option set correctly before proceeding, double-click on the pom.xml file of your parent project in the Project Explorer.
- In the Overview settings page that is now displayed in your workbench, confirm that the option Packaging is set to pom. If it is not, select pom from the list menu and save the changes to your pom.xml file.
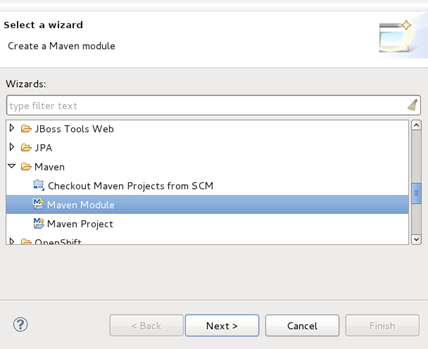
- From your workspace navigate to File → New → Other and from the wizard selection screen select Maven → Maven Module.
- Type a name for the module in the Module Name field.
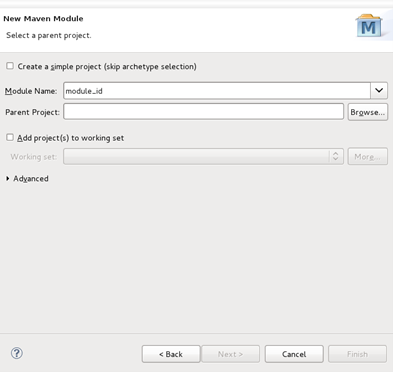
- Click the Browse button beside the Parent Project field. This will launch a project selection box.
- Select the project to be used as the parent project of the module you are creating and click OK.
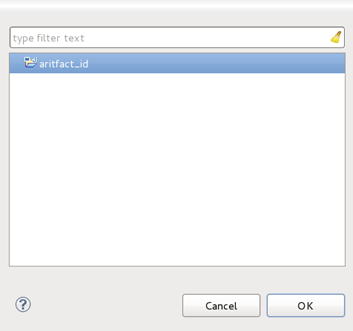
- You will be returned to the Select a parent project screen and the Parent Project field will contain the name of the project you selected.
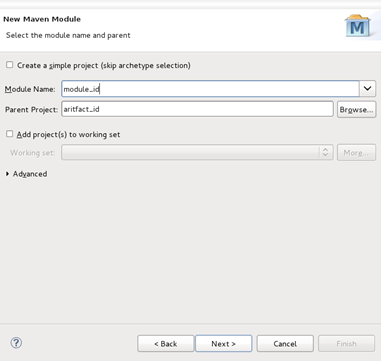
- Click the Next button.
- Select an archetype available in the list displayed. For the purposes of this example the maven-archetype-quickstart is selected.
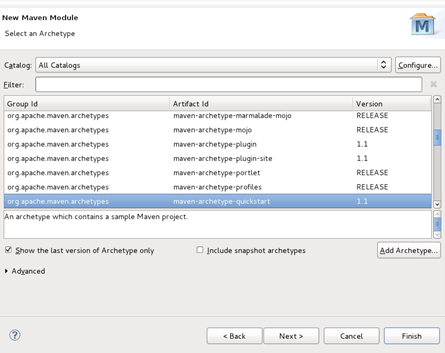
- Click the Next button.
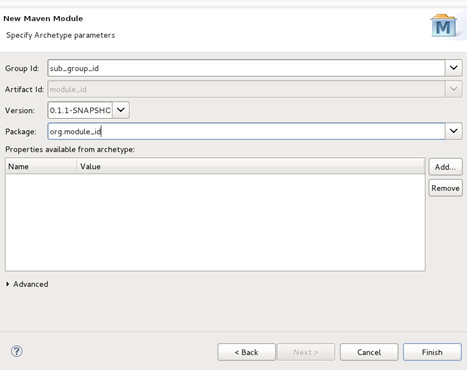
- Specify archetype parameters Group Id and Version. Ensure that the values you specify for these fields are unique from those set in the parent project.
- In this example, the Group Id and Version settings of the parent project used are set to group_id and 0.0.1-SNAPSHOT respectively. For the module, Group Id and Version settings are being specified as sub_group_id and 0.1.1-SNAPSHOT respectively, to avoid conflict.
- Click the Finish button.
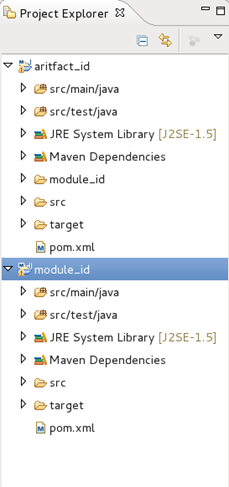
- The module will now be created and appear in your Project Explorer.
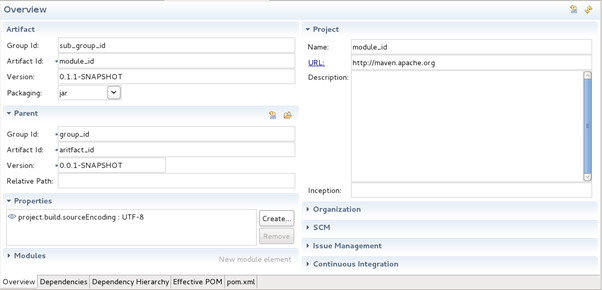
- You can view and change settings associated with the module by selecting the module’s pom.xml file from the Project Explorer and double-clicking on it. This will launch an Overview screen containing the module settings.
Introduction to Maven Module and Bill of Materials (BOM)
Imports are most effective when used for defining a “library” of related artifacts that are generally part of a multiproject build. It is common for one project to use one or more artifacts from these libraries. However, it has sometimes been difficult to keep the versions in the project using the artifacts in synch with the versions distributed in the library. The pattern below illustrates how a “bill of materials” (BOM) can be created for use by other projects.
The root of the project is the BOM POM. It defines the versions of all the artifacts that will be created in the library. Other projects that wish to use the library should import this POM into the dependencyManagement section of their POM.
Introduction to Git Repository
Git is a program that tracks changes made to files. Once installed, Git can be initialized on a project to create a Git repository.
A Git repository is the .git/ folder inside a project. This repository tracks all changes made to files in your project, building a history over time. Meaning, if you delete the .git/ folder, then you delete your project’s history.
Clone a Maven project from github
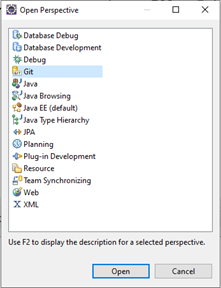
- To open Git perspective, go to Window > Perspective > Open Perspective > Other > Git > Open.
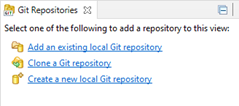
- In the Git Repositories tab, select Clone a Git repository.
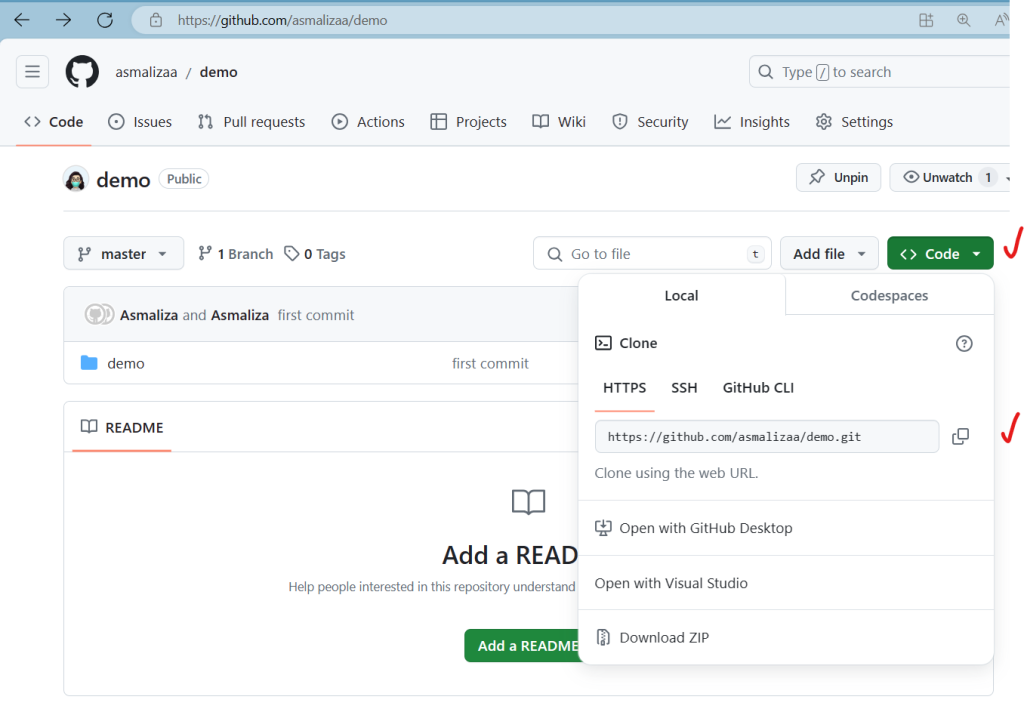
- As an example, let’s close a sampe project from a public repository https://github.com/asmalizaa/demo Make sure to copy the URL to the repository before proceeding with the next step.
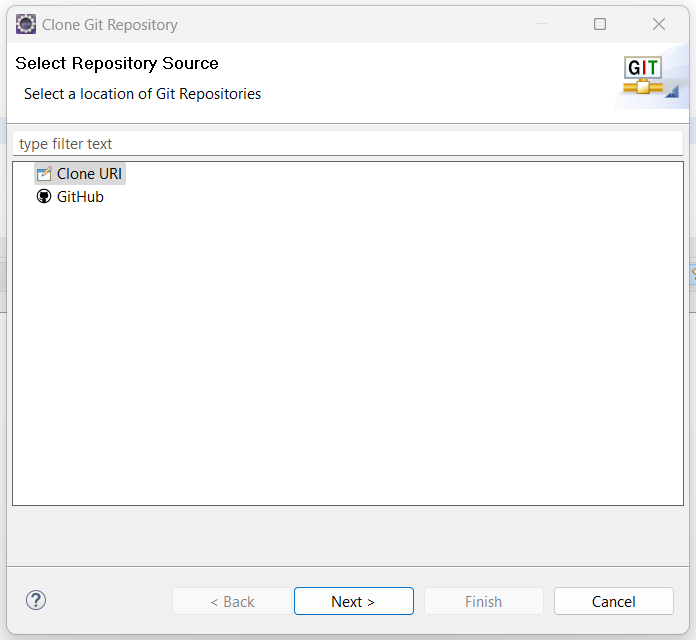
- Back in the eclipse, in the “Clone Git Repository” wizard, select “Clone URI” then click Next.
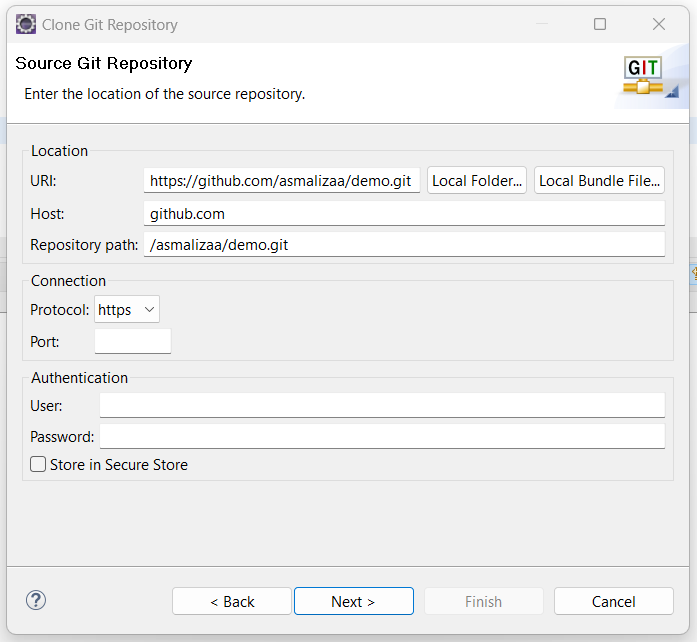
- In the “Source Git Repository” page, paste the link you’ve copied earlier into URI. All the other fields will be automatically populated. Click Next.
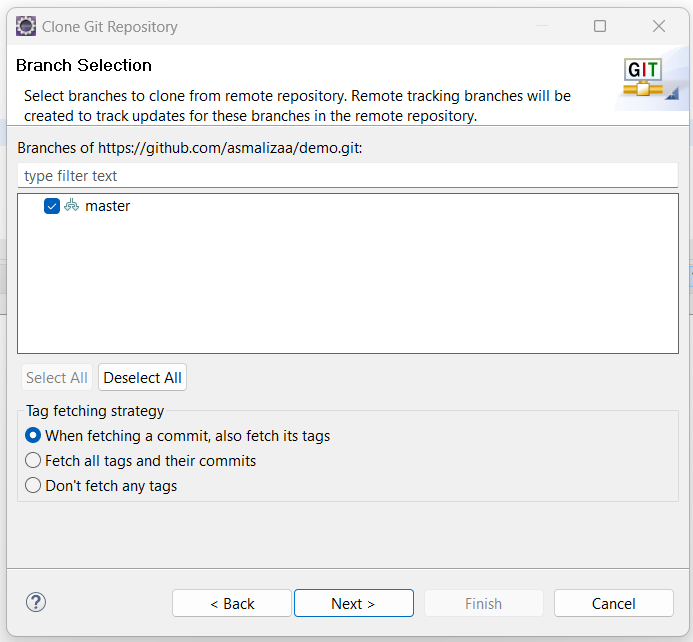
- In the Branch selection screen, accept default setting then click Next >
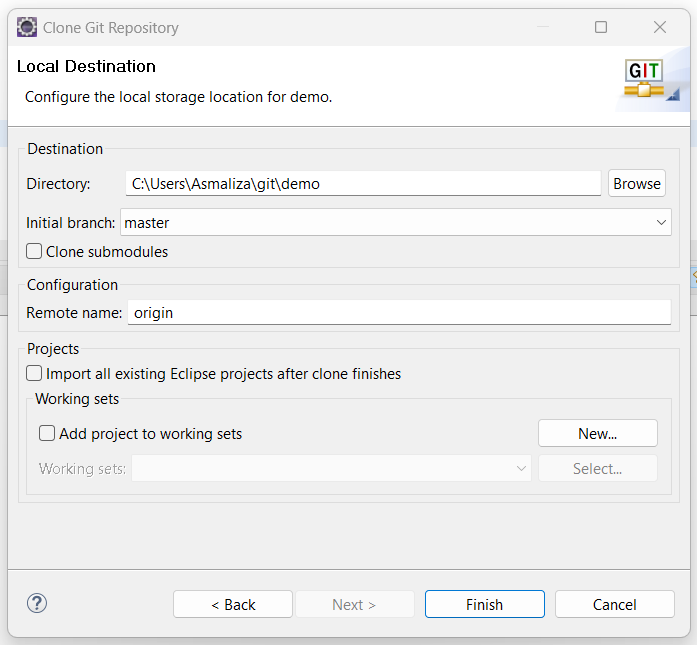
- Set the location of the project, then click Finish.
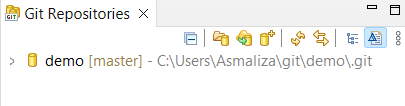
- You will see the newly cloned project is added.
Import a Maven project into Eclipse
To start working with the newly cloned project from github, we must first import it into eclipse.
- If required, switch to Java/Java EE perspective.
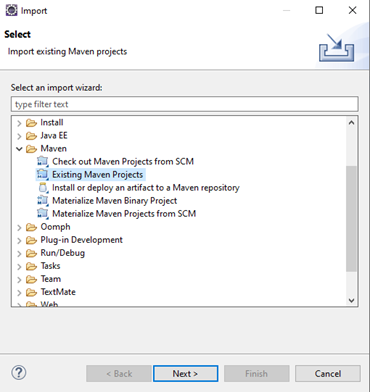
- In eclipse, select File > Import > Maven > Existing Maven Projects, then click Next >
- Click Browse and select the directory that contains the pom.xml file of the project you want to import.
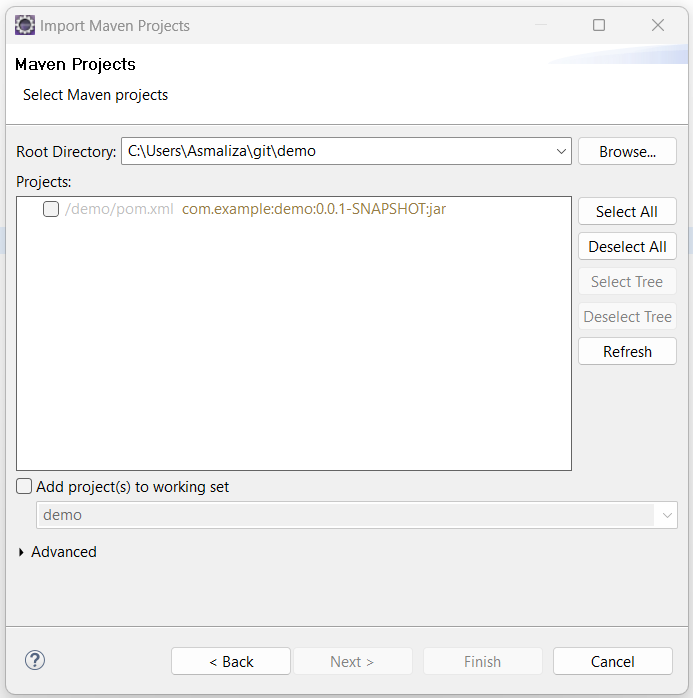
- Click Finish. Eclipse will import the project and start downloading the required resources.