Tasks
- Create a new app project
- Create the app user interface
- Configure the android application codes
- Run the application
Create a new project
- Launch Android Studio

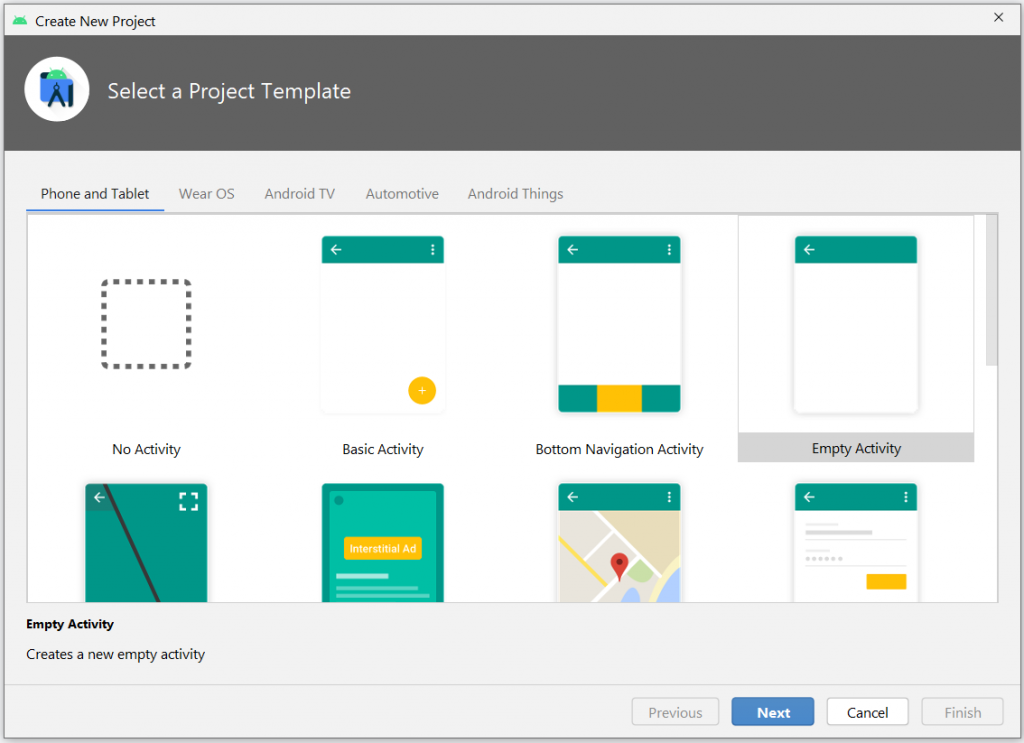
2. Select “Create New Project”. In the next screen, select “Empty Activity” then click “Next”.
3. Fill up the application settings with below configurations;
- Name: Pizza Ordering App
- Package Name: com.example.pizzaorderingapp (auto-generated)
- Save location: select your directory or leave to default settings
- Language: Kotlin
- Minimum SDK: leave to default selection
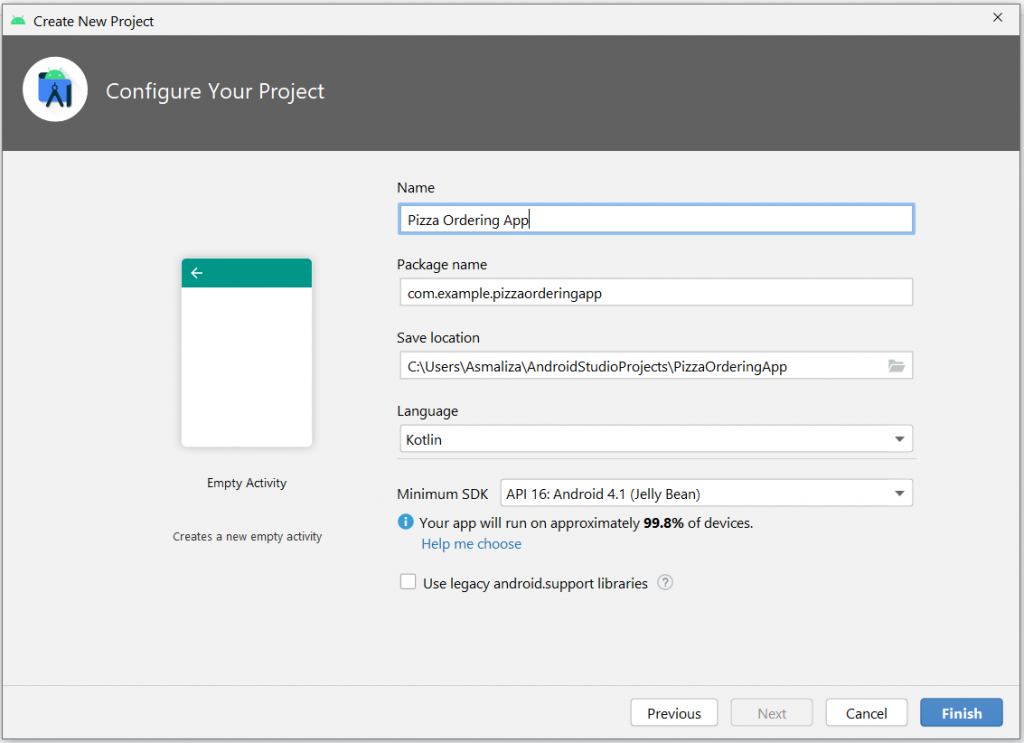
Then click “Finish” to proceed.
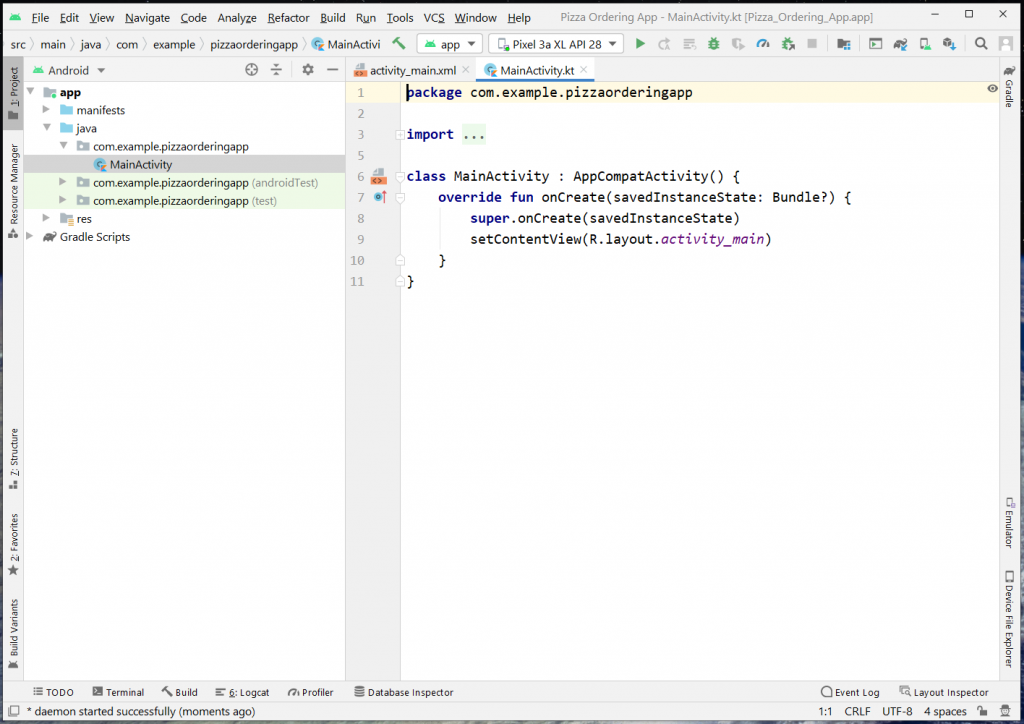
Wait a few seconds while Android Studio prepares your project. Once the process completed, you may begin with your development.
4. Update build.gradle (Module:First_Calculator) to add the kotlin android extensions. Your settings (first few lines) should look something like below.
plugins {
    id 'com.android.application'
    id 'kotlin-android'
    id 'kotlin-android-extensions'
}
Once saved, you need to sync the project.
5. Click on “activity_main.xml” to open the layout file.
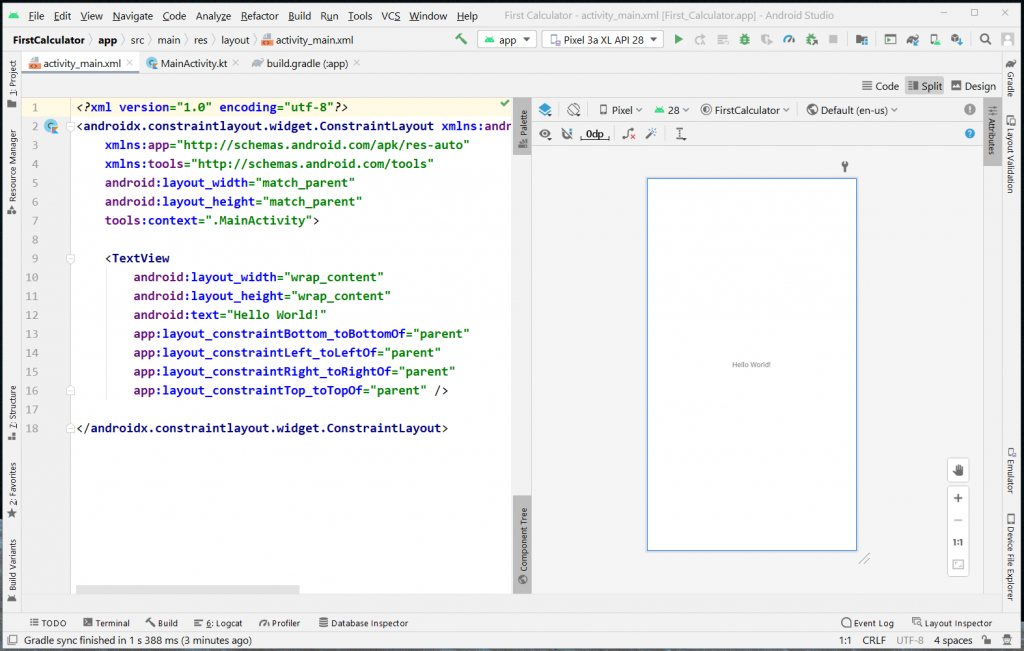
You have two ways to update the activity layout: Code or Design tab (or both if your screen is big enough to open split view).
Create the app user interface
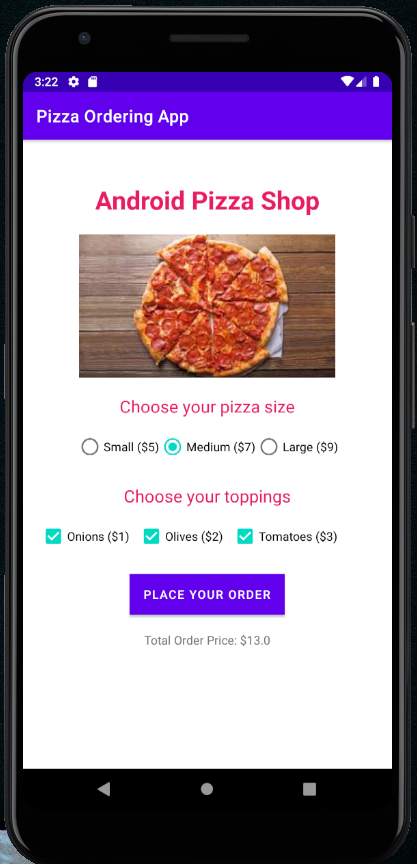
The final app user interface should look similar to below screenshot.

Add image to app
- Search for a pizza picture from Google and download to your local director.
- To add the pizza image to your activity layout, open the app > res > drawable folder.
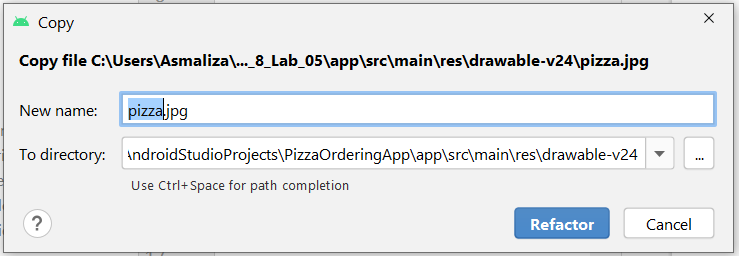
- Copy the previously downloaded pizza picture, right-click the drawable folder, then click “Paste”.
- Select the drawable-24 option as shown below, then click “Ok”.
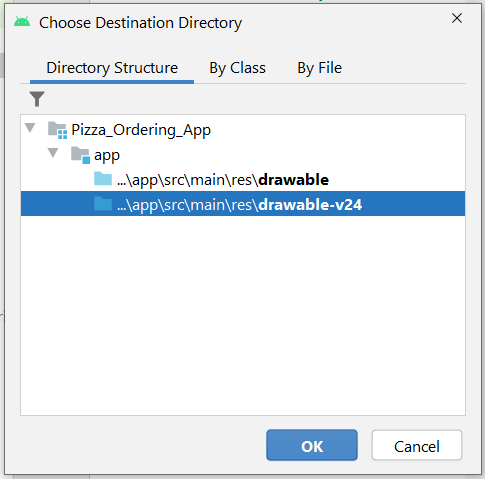
Important: file-based resource names must contains only lowercase a-z, 0-9 or underscore.
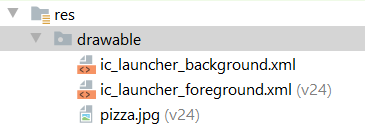
Now you should see the pizza.jpg has been added to your drawable folder.
Update the activity_main.xml layout file
- Delete “Hello World” text from the center of the activity layout.
- From the palette panel, drag the “TextView” and drop it on the activity layout. Change the attribute for this TextView as follows.
| text: | Android Pizza Shop |
| textSize: | 30sp |
| textStyle: | Bold |
3. Constraint the left, top, and right margins of “Android Pizza Shop” text to ensure that its location will not change when you run this app.
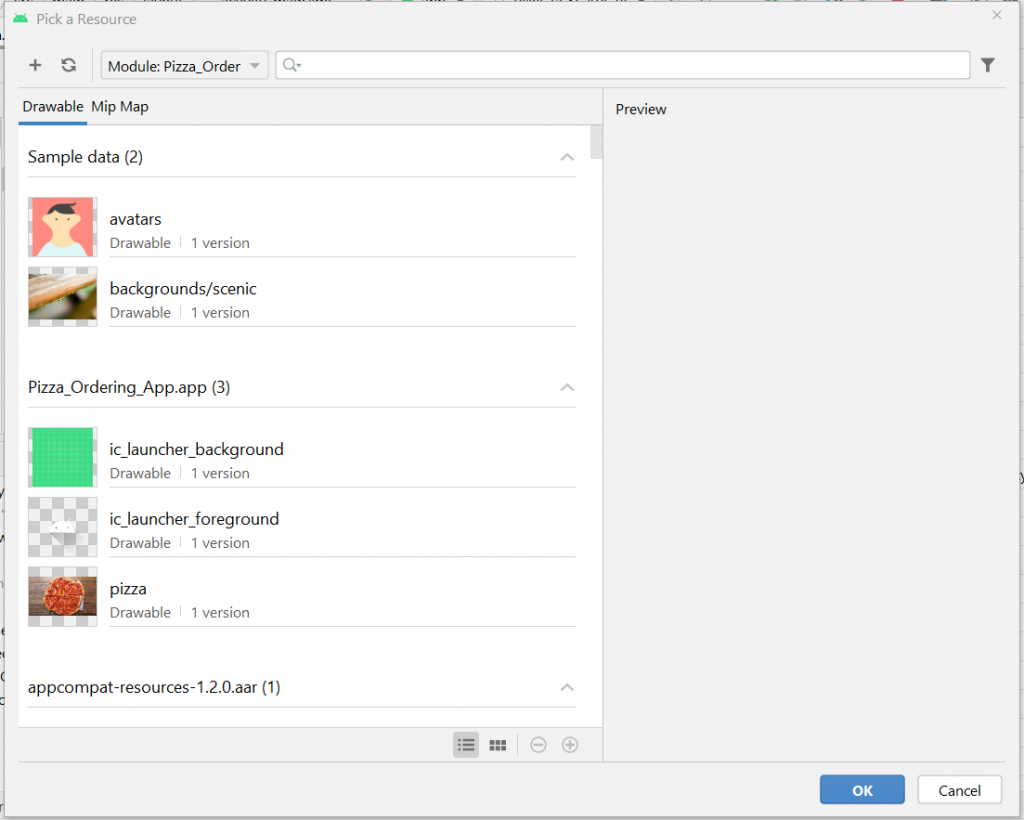
4. Next, to add the image to activity layout. Select and drag “ImageView” and drop it on the activity layout. You will below dialog displayed. Select your pizza image from the list, then click “Ok”.
5. Constraint the left, top, and right margins of pizza image to ensure that its location will not change when you run this app.
6. Add another “TextView” to activity layout and change its attributes to below settings.
| text: | Choose your pizza size |
| textSize: | 18sp |
As usual, don’t forget to constraint the textview.
7. Add three radio buttons to the activity layout.
| id: smalPizza | id: mediumPizza | id: largePizza |
| text: Small ($5) | text: Medium ($7) | text: Large ($9) |
8. Add “RadioGroup” to the activity layout file to group these three radio buttons. This is to make sure that user can only select one radio button at any particular time.
9. Add another “TextView” to the activity layout file. Use below settings to update the attributes. Constraints this text view as well.
| text: | Choose your toppings |
| textSize: | 18sp |
10. Next, add three checkboxes to the activity layout. Constrain it.
| id: OnionsCheckBox | id: OlivesCheckBox | id: TomatoesCheckBox |
| text: Onions ($1) | text: Olives ($2) | text: Tomatoes ($3) |
11. Add a “Button” to the layout activity. Constraint it then set the attributes using below settings.
| id: | orderButton |
| text: | Place Your Order |
This button will be used to calculate the total price for the pizza ordered. The total amount will be displayed below the button.
12. Finally, add yet another “TextView” to the activity layout with below settings. Constraint it.
| id: | totalprice |
Delete the default value for the text attribute.
13. The final app user interface should look similar to below.
The sample layout codes is as below.
<?xml version="1.0" encoding="utf-8"?>
<androidx.constraintlayout.widget.ConstraintLayout xmlns:android="http://schemas.android.com/apk/res/android"
    xmlns:app="http://schemas.android.com/apk/res-auto"
    xmlns:tools="http://schemas.android.com/tools"
    android:layout_width="match_parent"
    android:layout_height="match_parent"
    tools:context=".MainActivity">

    <TextView
        android:id="@+id/textView"
        android:layout_width="wrap_content"
        android:layout_height="wrap_content"
        android:layout_marginTop="50dp"
        android:text="Android Pizza Shop"
        android:textColor="#E91E63"
        android:textSize="30sp"
        android:textStyle="bold"
        app:layout_constraintLeft_toLeftOf="parent"
        app:layout_constraintRight_toRightOf="parent"
        app:layout_constraintTop_toTopOf="parent" />

    <ImageView
        android:id="@+id/imageView"
        android:layout_width="wrap_content"
        android:layout_height="wrap_content"
        android:layout_marginTop="20dp"
        app:layout_constraintLeft_toLeftOf="parent"
        app:layout_constraintRight_toRightOf="parent"
        app:layout_constraintTop_toBottomOf="@+id/textView"
        app:srcCompat="@drawable/pizza" />

    <TextView
        android:id="@+id/textView2"
        android:layout_width="wrap_content"
        android:layout_height="wrap_content"
        android:layout_marginTop="20dp"
        android:text="Choose your pizza size"
        android:textColor="#E91E63"
        android:textSize="20sp"
        app:layout_constraintLeft_toLeftOf="parent"
        app:layout_constraintRight_toRightOf="parent"
        app:layout_constraintTop_toBottomOf="@+id/imageView" />

    <RadioGroup
        android:id="@+id/group1"
        android:layout_width="wrap_content"
        android:layout_height="wrap_content"
        android:orientation="horizontal"
        app:layout_constraintLeft_toLeftOf="parent"
        app:layout_constraintRight_toRightOf="parent"
        app:layout_constraintTop_toBottomOf="@+id/textView2"
        android:layout_marginTop="10dp">

        <RadioButton
            android:id="@+id/smallPizza"
            android:layout_width="wrap_content"
            android:layout_height="wrap_content"
            android:text="Small ($5)"/>

        <RadioButton
            android:id="@+id/mediumPizza"
            android:layout_width="wrap_content"
            android:layout_height="wrap_content"
            android:text="Medium ($7)"/>

        <RadioButton
            android:id="@+id/largePizza"
            android:layout_width="wrap_content"
            android:layout_height="wrap_content"
            android:text="Large ($9)"/>
    </RadioGroup>

    <TextView
        android:id="@+id/textView3"
        android:layout_width="wrap_content"
        android:layout_height="wrap_content"
        android:layout_marginTop="20dp"
        android:text="Choose your toppings"
        android:textColor="#E91E63"
        android:textSize="20sp"
        app:layout_constraintLeft_toLeftOf="parent"
        app:layout_constraintRight_toRightOf="parent"
        app:layout_constraintTop_toBottomOf="@+id/group1" />

    <CheckBox
        android:text="Onions ($1)"
        android:layout_width="wrap_content"
        android:layout_height="wrap_content"
        android:id="@+id/OnionsCheckBox"
        app:layout_constraintTop_toBottomOf="@+id/textView3"
        app:layout_constraintLeft_toLeftOf="parent"
        android:layout_marginLeft="20dp"
        android:layout_marginTop="10dp"/>

    <CheckBox
        android:text="Olives ($2)"
        android:layout_width="wrap_content"
        android:layout_height="wrap_content"
        android:id="@+id/OlivesCheckBox"
        app:layout_constraintTop_toBottomOf="@+id/textView3"
        app:layout_constraintLeft_toRightOf="@+id/OnionsCheckBox"
        android:layout_marginLeft="10dp"
        android:layout_marginTop="10dp"/>

    <CheckBox
        android:text="Tomatoes ($3)"
        android:layout_width="wrap_content"
        android:layout_height="wrap_content"
        android:id="@+id/TomatoesCheckBox"
        app:layout_constraintTop_toBottomOf="@+id/textView3"
        app:layout_constraintLeft_toRightOf="@+id/OlivesCheckBox"
        android:layout_marginLeft="10dp"
        android:layout_marginTop="10dp"/>

    <Button
        android:id="@+id/orderButton"
        android:layout_width="wrap_content"
        android:layout_height="wrap_content"
        android:layout_marginTop="20dp"
        android:background="#E91E63"
        android:onClick="onPlaceOrderButtonClicked"
        android:text="Place Your Order"
        app:layout_constraintLeft_toLeftOf="parent"
        app:layout_constraintRight_toRightOf="parent"
        app:layout_constraintTop_toBottomOf="@+id/TomatoesCheckBox" />

    <TextView
        android:text=""
        android:layout_width="wrap_content"
        android:layout_height="wrap_content"
        android:id="@+id/totalprice"
        app:layout_constraintTop_toBottomOf="@+id/orderButton"
        app:layout_constraintLeft_toLeftOf="parent"
        app:layout_constraintRight_toRightOf="parent"
        android:layout_marginTop="20dp"/>

</androidx.constraintlayout.widget.ConstraintLayout>
Configure the android application codes
- Open MainActivity.kt to update the application codes.
- Copy the codes below and paste it into MainActivity.kt, after onCreate() function.
fun onPlaceOrderButtonClicked(view: View) {
        var pizzaSizePrice = 0.0
        var toppingsTotal = 0.0

        when {
            group1.smallPizza.isChecked -> pizzaSizePrice = 5.0
            group1.mediumPizza.isChecked -> pizzaSizePrice = 7.0
            group1.largePizza.isChecked -> pizzaSizePrice = 9.0
        }

        if (OnionsCheckBox.isChecked) toppingsTotal += 1
        if (OlivesCheckBox.isChecked) toppingsTotal += 2
        if (TomatoesCheckBox.isChecked) toppingsTotal += 3

        totalprice.text = "Total Order Price: $" + (pizzaSizePrice + toppingsTotal)
    }
3. The completed codes should look like this.
package com.example.pizzaorderingapp

import androidx.appcompat.app.AppCompatActivity
import android.os.Bundle
import android.view.View
import kotlinx.android.synthetic.main.activity_main.*
import kotlinx.android.synthetic.main.activity_main.view.*

class MainActivity : AppCompatActivity() {
    override fun onCreate(savedInstanceState: Bundle?) {
        super.onCreate(savedInstanceState)
        setContentView(R.layout.activity_main)
    }

    fun onPlaceOrderButtonClicked(view: View) {
        var pizzaSizePrice = 0.0
        var toppingsTotal = 0.0

        when {
            group1.smallPizza.isChecked -> pizzaSizePrice = 5.0
            group1.mediumPizza.isChecked -> pizzaSizePrice = 7.0
            group1.largePizza.isChecked -> pizzaSizePrice = 9.0
        }

        if (OnionsCheckBox.isChecked) toppingsTotal += 1
        if (OlivesCheckBox.isChecked) toppingsTotal += 2
        if (TomatoesCheckBox.isChecked) toppingsTotal += 3

        totalprice.text = "Total Order Price: $" + (pizzaSizePrice + toppingsTotal)
    }
}
Run the application